About:
This guide will explain how to enable all features in iCloud and iMessages on your Hackintosh. iCloud is a cloud storage solution provided from Apple since Mac OS X 10.7.2. It allows users to seamlessly have access to various files types including documents, email, notes, calendar on multiple systems. Also included is Back to My Mac and Find My Mac. iCloud can be accessed from either a Mac or there iCloud website found here.
Accreditation:
Eep357’s post found here
Black OSX’s post found here
Joel Bruner’s post found here
Lebowski’s post found here
Index:
Part 1A: Ethernet Built In With DSDT/SSDT
Part 1B: Ethernet Built In With No DSDT/SSDT
Part 2: Serial Number
Part 3: Installing The Latest Bootloader
Part 4: Recovery Partition
Part 5: iMessages
Part 6: Creating NVRam
Part 7: Boot File Not Hidden
Guide:
Part 1A: Ethernet Built In With DSDT/SSDT
1. Review my guide here
2. Go to:
/Library/Preferences/SystemConfiguration/
3. Remove:
NetworkConfiguration.plist
4. Restart
5. Log into iCloud
Part 1B: Ethernet Built In With No DSDT/SSDT
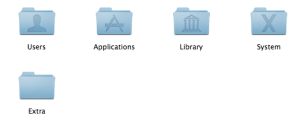
1. Go to your root of your drive and locate your Extra folder:
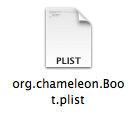
2. Open your Extra folder and locate the following file:
3. Add the following to your org.chameleon.Boot.plist:
<key>EthernetBuiltIn</key>
<string>Yes</string>
4. An example of org.chameleon.Boot.plist:
<?xml version=”1.0″ encoding=”UTF-8″?>
<!DOCTYPE plist PUBLIC “-//Apple//DTD PLIST 1.0//EN” “http://www.apple.com/DTDs/PropertyList-1.0.dtd”>
<plist version=”1.0″>
<dict>
<key>EthernetBuiltIn</key>
<string>Yes</string>
<key>Kernel Flags</key>
<string>npci=0x2000</string>
<key>UseKernelCache</key>
<string>No</string>
</dict>
</plist>
5. Save org.chameleon.Boot.plist
6. Go to:
/Library/Preferences/SystemConfiguration/
7. Remove:
NetworkConfiguration.plist
8. Save org.chameleon.Boot.plist and restart
9. Log into iCloud
Part 2: Serial Number
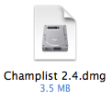
1. Download Champlist found here and a special thank you to the developer(s) of this App.
2. Open up your Downloads folder in Finder and locate this DMG:
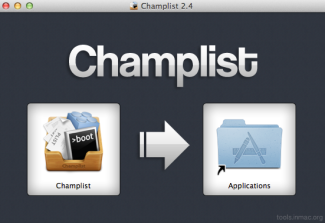
3. Double click DMG to mount and then following screen will appear:
4. Now drag Champlist to the Applications folder
5. Open Launch Pad and locate this App:
6. The following menu will appear:
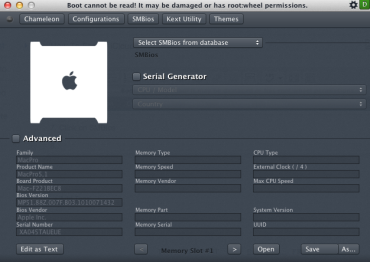
7. Click on SMBios and the following menu will appear:
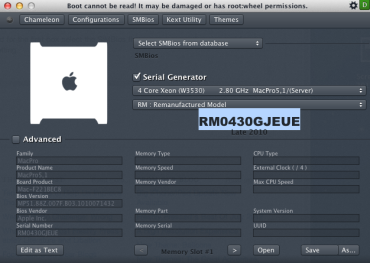
8. Click on Serial Generator and for the first box select the SIMBios that you are currently using and for the second box choose any setting.
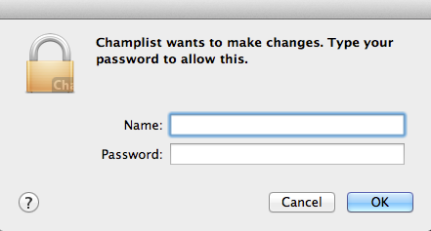
9. Next click on save and enter your password:
10. Restart and attempt to log into iCloud. If the log in is unsuccessful repeat 5 trough 10.
Part 3: Installing The Latest Bootloader
1. Download the latest Chameleon Bootloader here or manually here (Recommended)
2. Go to your download folder and locate the following package:
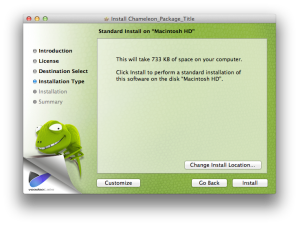
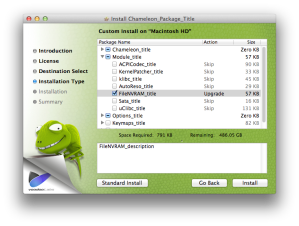
3. Open the install package and get to the following screen:
4. Click on Customize:
5. Click on FileNVRAM-title or using the manual method locate the modules folder and copy FileNVRAM and create a folder in your Extra folder called Modules and put the file there:
6. Click on Install:
7. Restart two times before continuing to Part 4
Part 4: Recovery Partition
1. Download RecoveryHDUpdater_xxxxx.dmg
For Mountain Lion: here
2. Mount the DMG by double clicking on the DMG
3. Run RecoveryHD Updater.command:
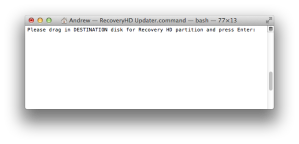
4. The following screen should appear:
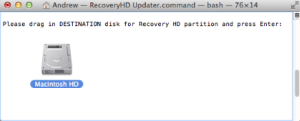
5. Drag the HDD icon of your boot drive into the window:
6. Press enter
7. Once complete restart
8. Go to iCloud and check in Back To My Mac and if you can select the box with out a error the edit is working successfully.
9. Continue to Part 5
Part 5: iMessages
1. Log into iMessages and if you receive a error stating to call Apple go to iTunes or Appstore and add a valid Credit Card
2. Continue to Part 6
Part 6: Creating NVRam
1. Log into every Apple application that requires you to use your Apple ID at this time
2. Download com.nvram.root.plist found here
3. Open Terminal:
4. Type in:
Sudo su
5. Press Enter and enter your Password
6. The following screen should appear:
7. Type in:
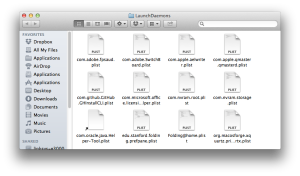
Open /Library/LaunchDaemons
8. Press Enter
9. The following folder should appear:
10. Copy com.nvram.root.plist that you downloaded into this folder and then close the folder
11. In Terminal type in:
sudo chown root:wheel /Library/LaunchDaemons/com.nvram.root.plist
12. Go to iCloud and check in Find My Mac:
Note You May Be Prompted To Enable Location Services You Must Enable This
13. In Terminal type in:
sudo nvram -p > /var/log/nvram.log
14. Go to your Extra folder:
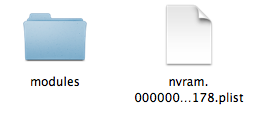
15. Remove the folder Modules and the file nvram:
16. After restart verify that Find My Mac check box is still selected and that you are still logged into iMessages. If so the edit is working Successfully.
Part 7: Boot File Not Hidden
1. If the file Boot is not hidden at the root of the drive open Terminal:
2. Run the following command:
sudo chflags hidden /boot
3. Enjoy












does this do anything to facetime it crashes as soon as call is connecting
Could help. Doing all of this may help. Try it and see what happens.
Thank You!! I thought if you got the message about call apple you had to continue. Works great now. I’m a noob but learning.
Enjoy.
Fantastic tutorial! Started working after the V2.2 Chameleon update with NVRAM option. Thanks a TON!
Enjoy.
Hi rampagedev, I can’t do it with no 11 “Note You May Be Prompted To Enable Location Services You Must Enable This” . MAC can’t be located, so what can I do?
Thats normal if you do not have wifi. You can still check the box.
Is this Recovery Partition bootable and works on a hackintosh? What is the function of it? Is this something you recommend?
Thanks!
See Black OSX’s post under accreditation.
so if i have not a credit card, tutorial (for imessage) doesnt work,
Yep.
So simply entering a credit card to your Apple-ID would fix the iMessage issue without going through this tutorial ?
No. Follow the guide as show above. You really think I would make a guide about this if that was the fix? lol
hello, thx a lot for your help. but behind RecoveryHDUpdater i can´t boot into WinXP and Fusion can´t start it too. is there a way to bring it back ? thx in advance
You need Clover in your case. I do not support dual boot on the same HDD.
Clover (with the proper files installed to that partition) can boot into it.
fixed it with Winclone.app. RecoveryHDUpdater set my WinXP volume from disk0s4 to disk0s5. top tutorial!
@carstimann,
Would you mind explaining the steps you did with Winclone.app to fix your issue ?
Thx,
Mac
? What are you talking about? I did everything by hand.
The question was directed to Carstimann asking what he did with Winclone.app
Above you wrote,
Part 6: Creating NVRam
3. Type in:
Sudo su
4. Press Enter and enter your Password
10. In Terminal type in:
sudo chown root:wheel /Library/LaunchDaemons/com.nvram.root.plist
12. In Terminal type in:
sudo nvram -p > /var/log/nvram.log
Why sudo in 10. & 12. ??? After 3. & 4. you’re already root !
I recommend you Google for “apple terminal help”
Its because some people skip Sudo Su… it happens a lot so to avoid stupid questions I keep that part in. Understand? People skim a lot…
proper way would be sudo -s for the session but that comes from not elevating people to the (root) account for things that all they need it sudo for…
No it would not be the proper way at all.
Pingback: New Nvidia Retail Driver Install Solution | rampagedev
I am still getting the error “Could not sign in to iMessage. The server encountered an error processing registration. Please try again later.” with Messages running 10.8.3 on Asus P9x79 Pro
Some possible issues:
• I have 2-step authentication on my appleID
• My internet connection is through an Apple USB ethernet adapter, not the built-in ethernet
Does using 2 ethernet ports cause an issue? How can I find out if my ethernet is built in my DSDT?
At what step in the guide?
I completed the entire guide and everything seemed to be working through step 6 until after the step 6 restart. Seems like the recovery partition did not stick since “Find My Mac” says there is no recovery partition now. Would that cause Messages to fail to login? I don’t plan on ever using Find My Mac.
Going to try again from the top.
Yes, just start from the top. Remove the generated file from the log folder before starting again. and if that is missing thats what you missed.
Do I need to add “EthernetBuiltIn
Yes” or is it already added to the DSDT you made for me? How can I check my DSDT for it?
If you do not know then add it.
Is it okay to stop at step 5? Everything is currently working.
If you want…
What does creating NVRam actually do? Is it something I should have or will help keep the computer more stable?
http://support.apple.com/kb/HT1379?viewlocale=en_US&locale=en_US
It enables a lot of things on a real mac. The new Nvidia retail drivers write to the Nvram to load the newer drivers for example. Also holds your log in token for iCloud.
Pingback: Apple Quietly Updates Recovery Partition For Mac OS X 10.9 | rampagedev
Hello, I have a machine that requires the “Part 1A: Ethernet Built In With DSDT”. When I click on your guide link it says page not found. Can you please put up the guide?
Working here. The guide was never taken down. Also if you looked around in the menu you could have found it there as well.
Okay, It worked now.
Thanks!
Hi, trying to figure out why iMessage is the only thing not working in my mackintosh- should I go through the entire process, or just the iMessage part? BTW using Mavericks now and I see links for Lion and ML would the ML work or should I wait? THx
Your over looking something. Make sure NVRam is installed.
The great instruction!! Thanks!
Unfortunately I’d start to use 10.9 Mavericks (on Hackintosh) and there are no RecoveryHD partition of course. Could you please upload to your Dropbox and public there a link to RecoveryHDUpdater_xxxxx.dmg for that OS version?
Thanks
Use the one here on the page as Apple will update it auto maticly.
Thank you, master.
lol. The update will show up under Software Updates. Enjoy.
Dosent work anymore. Applel does lock out Hackintosh vom iMessage now.
Also a working imessage will be dead. Log out and you will see.
A real Macos Serial we can emulate. We need a tool to emulate a real Macos Mac adress + Hardware-UUID
No… Thats not true. Understand how my method works.
Thank you for this guide.
With this guide I can at least login without an error,
but the account ist still inactive.
I did try to turn on and off the activate button with no success.
When I try to send a message. The receiver is red.
And a error pop up says „Your iMessage Account ist non-registered“
You have any idea what to do?

See the screenshot on the webpage:
cybergenics.de/01.png
Never seen that before.
How can I activate the acount?
I have the same problem 😦
Don’t log out.
Perhaps you did that?
I have the hackintosh 2 weeks ago reinstalled
Thank you for this guide.
With this Guide I can at least login without an error,
but the account ist still inactive.
I did try to turn on and off the activate button with no success.
When I try to send a message. The receiver is red.
And a error pop up says „Your iMessage Account ist non-registered“
You have any idea what to do?

See the screenshot on the webpage:
cybergenics.de/01.png
@tom Just add a valid credit card to your apple id to log in 😉
Hi Rampagedev,
do your hackintoshes all have a wifi card? I believe that imessage is somehow linked to location services which i do not have since there is no wifi card in my hackintosh.
thanks in advance,
Jannik
No.
Woah this looks like a solid solution, though lengthy.
So steps 5-10 of Part 2 are just to get a serial that works? The implication being that it’s all you need to be able to sign in to icloud through the Sys Prefs pane, apart from a dsdt/plist solution that shows Ethernet as being built-in (I have it via dsdt). I’ve tried a few and I can keep trying many more, but I guess I’m losing hope that it’s that “simple” haha. This may also explain however why I haven’t been able to login into iCloud/Facetime even on my old 10.7 install, which did at one point when that fix was implemented into Cham.. So confusing.
As for the partition creator, it wouldn’t matter how many partitions are on the drive? I’m testing first on a backup drive with multiple storage partitions.
Thanks for the hard work.
It just covers every last thing that could be wrong.
I see, but I keep trying serial #’s and I still cannot log into iCloud (Via sys prefs). So I don’t know if I should keep trying more serials or start trying other things, like skipping to the next steps here.
As for the HDRecoverydmg, which do I use if I’m on 10.9? If it’s being updated auto later, does it matter? Hmm now I’m wondering if I may have a recovery partition, My main drive is 10.7 but installed via usb installer, and it was 10.8’s installer that doesn’t create one?
Does not matter. Apple will update the recovery partition.
It does not matter how many partitions you have.
So I finally was able to Login to iCloud. I had tried various random serials and I would get the same error.
Two things I think helped:
1. I found this: http://support.apple.com/kb/TS3970?viewlocale=en_US&locale=en_US
It states that if you have multiple icloud emails associated with each other it could be a problem. So I went into my accts, and cleaned out the alternate emails.
2. I started removing my network devices in Sys Prefs, I know that it used to be recommended to have Ethernet set as En0, which I thought I did, but anyways just cleaned it out, uninstalled my 3rd party wifi, and bluetooth, then added Ethernet, etc one by one. After a couple of restarts I logged in.
Not sure which of these helped but I got in and followed all the following steps here and it all seems to have worked.
Party 6 step 15: What is that nvram.00000…178.plist? Wasn’t mentioned in the instructions before =P. Thanks again!
Oh I forgot to mention, after the last step and the last restart, my login screen had the guest account enabled. I’ll just disable it, but interesting that the steps lead to enabling it somehow.
Just updated to 10.9.2 and can’t login to Facetime/Messages again? Does some configuration here need to be updated? Man is apple going to keep breaking this somehow lol.
Will look into it when I get home.
Got it working, I simply deleted /Library/Preferences/SystemConfiguration/networkconfiguration.plist
Hey Rampagefev,
Two questions.. 1) Will this work on 10.9.x 2) Will this work without 1A (ethernet built-in)? My ethernet ports are working fine out of the box and I never messed with with dstd and u know what they say.. if it aint broke… 🙂
Yes and No. The Ethernet part has nothing to do with physical factuality but digital authentication.
Just one tip: since the guide didn’t work for my hackintosh tower, i researched and found a solution:
Try an older version of FileNVRam, namely 1.1.2. Search it on google. This totally worked for me. I believe that apart from the file a random serial number is just as important, but i believe this is it.
No. That means you did not update your boot loader and using Tmac S### tools. You created your own issue.
Okay, thanks for the info. I will try this if my solutions stops working. Thank you.
Trying to fix my icloud on 10.9.3 but cannot find networkconfiguration.plist in Library/Preferences/SystemConfiguration…
The only plist that is related to network in this location is NetworkInterfaces.plist….
Please advise.
Some systems it work and some it does not for no reason.
So I can no longer log into FaceTime or Messages. I’ve had this tweak on my mac since 10.9 came out and i’ve never had a problem until this week. I’m getting the Could not sign in to iMessage. An error occurred during activation. try again. I’ve switched to an older back up and it does the same thing, I even installed the Public beta of 10.10 and I’m getting the same thing on there. I’ve even changed the serial number. Any suggestions would be awesome. I’m running 10.9.4 on MP 6,1. I’ve even cleaned out the keychain and the .plist’s and the cache.
Is it possible to create a recovery HDD updater for yosemite10.10
If you did not know… When installing with clocer it automaticly makes one.
i have mbr disk for os x and i don’t think it create a recovery disk on mbr disk
and find my mac showing me error about recovery disk
I dont support mbr installs…
Does this solution still work after upgrade to 10.10? (with Chameleon?)
Again! I do not support 10.10 worh cham. Do not use cham.